Tips for travelling photographers
By Melanie Mahoney
Travel photography is a subjective thing. Some people prefer to take just a few shots of the major moments and sites they see, while others will happily fill a photo album before their plane has even landed. I’m happy to admit that I’m more of the latter than the former … what’s a trip away if you don’t document every single second? (Kidding. Kind of).
One person who definitely knows the benefit of travel photography is Warren Field, a photojournalist who has worked for magazines including Australian Geographic and Outdoor. He’s travelled around the world taking amazing shots (and getting paid for it!), so when he recently presented a talk on travel photography I was there, note pad in hand, to get some tips for budding photographers like myself.
Some of the following tips are fairly obvious, others not so much. Admittedly a lot of the talk of ‘F-stops’ and ‘lens size’ went over my head, so these tips are more about style than technical technique:
1. Experiment when travelling – take photos you wouldn’t normally bother with. Unexpectedly great results can come from it (and spectacular failures, too, but at least you’re learning!).
2. When taking a photo of a relatively still scene, use the autofocus feature, then fine tune it manually.
3. Get down low for interesting shots. Not everything needs to be at your eye level.
4. As always, the best light for photography is at daybreak/day’s end.
5. Sit and watch life; be patient. Good photos and amazing memories can come from it.
6. When taking portraits, it’s important to fill the frame with the subject. You should also focus on their eyes for a really great shot.
7. Reflections always offer fantastic opportunities for photos – whether it’s a lake, fountain or just a puddle, water is the photographer’s friend.
8. When taking photos at night, set the ISO to 400, not above.
9. If you don’t have a tripod (and really, how many amateur photographers do?), and you’re taking photos at night, set the self-timer to take the shot. It will reduce the slight camera movement and produce a clearer image.
10. To reduce shaking and blurriness, don’t just hold the camera in your hands. In the absence of a camera tripod, rest it on a bench, a low wall, your backpack on the ground, etc. You can also get special photography bean bags you rest your camera on to help with stability.
11. Lighting is an important part of photography (duh!) and shadows can ruin an otherwise pretty cool shot. Learn what you can about fill flash, and how to use your camera’s lighting options. Funnily enough, it’s not a matter of forcing your flash to fire in every photo…
You can see a gallery of Warren’s photos at www.warrenfield.com.au. He also holds one-on-one photography lessons to help familiarise students with their own cameras – contact him via his site.
Melanie works in publishing. Her skin crawls when she hears people referring to travelling as ‘doing’ a country; in the parlance of such pretentious jerks, she has ‘done’ Thailand and touristy South Pacific islands. She will soon be gallivanting across the Galapagos.
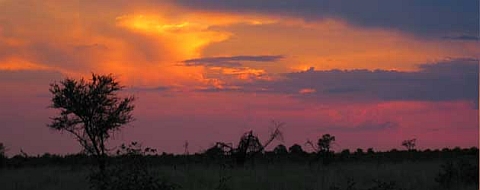
Note: Thanks to James Vimpany for the beautiful African sunset shot. James is a naturally gifted photographer.


My partner is “fill a photo album before their plane has even landed” type. It drives me a little batty at the time but I don’t regret it when we’re back at home.